That’s not too bad a photograph, is it? I don’t think it’s on par with my typical post-topping photos, which I carefully curate from the dozens I take on my hikes. However, as a cell phone picture of Stanley Park in Vancouver, BC, I think it’s reasonably nice.
It looks better than the real photo, anyway.
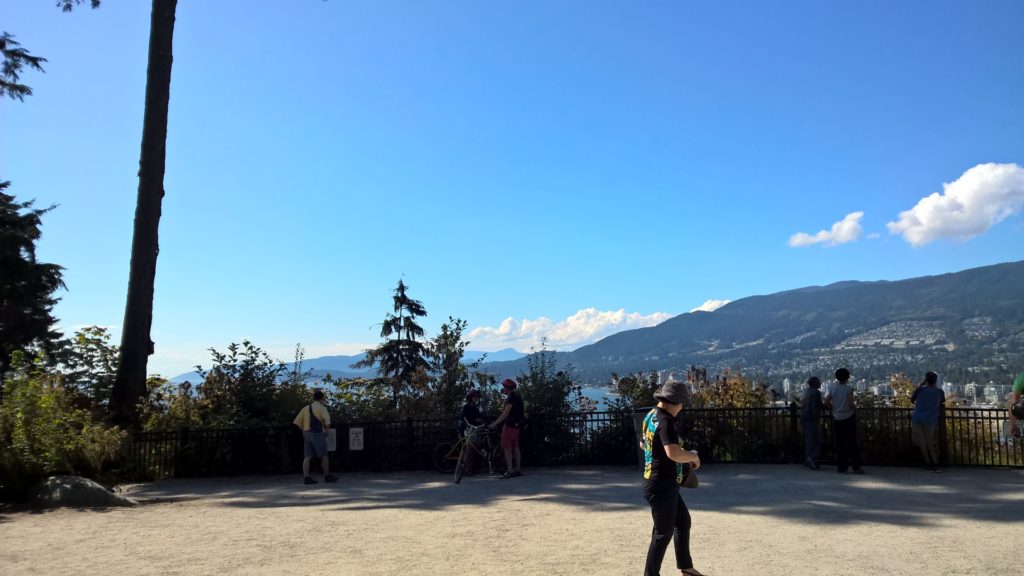
Yes, the original photograph really did have eight people in it who do not appear in the edited version. This is not the work of a professional. This was not created using Photoshop. Virtually no expertise is required to do this, and if your computer runs Windows 10, everything you need is probably already installed. And the whole process took me less than half an hour.
Let me emphasize: this is not a technical post. My intended audience here is everyone, regardless of technical proficiency, who wants to edit things out of photos and already uses Windows 10 as their operating system. You can do this; the rest of this post will talk about how.
(Also — I have to be honest — I’m writing this post in part so that I can point people in my own life to it, so they can learn how to do this themselves instead of having to ask me for help every time. Love you, Mom!)
Removing Objects with Paint 3D
That’s right: Paint. Microsoft Paint. Recent versions of the oldest, most familiar, most basic image editor in the world contain a powerful object-removal tool capable of the kinds of edits you see in the example above. Paint 3D specifically was added to Windows 10 in 2017 as a “refresh” of the classic Microsoft Paint application; it didn’t replace the old Paint, but it added a new alternative with a bunch of new features, most of which centered around basic 3D creation. However, Paint 3D also introduced some 2D-focused features as well; the one we care about today is called Magic Select.
In the following sections, I’ll give my recommended steps for how to remove an object; in a later post, I’ll give some context as to why I recommend these steps. However, I won’t go deeply into the technical details because (1) this isn’t a technical post and (2) my knowledge of Paint 3D isn’t all public information. I work at Microsoft, and I’ve worked directly with the Paint 3D team in general and the Magic Select feature in particular. Let me be clear that I do not speak for Microsoft here; this is a personal blog written on personal time, and nothing I say should be construed as anything but my own words, even though I happen to be writing about a Microsoft technology this weekend. And with that out of the way, let’s move on to actually removing things from an image.
Step 1: Opening Your Image in Paint 3D
For the purposes of learning, I recommend using the image from my example above as a starting point. Right-click on the image and, from the menu that appears, select, “Save image as…”
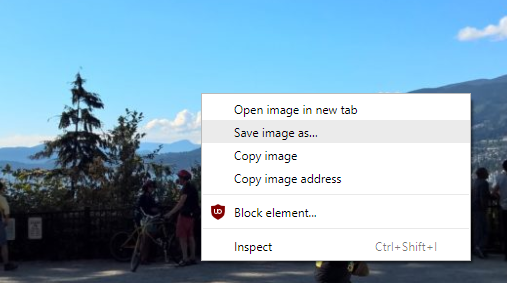
Save the image somewhere you can find it, then find the image in a folder view. (Usually, your browser will offer you an option to, “Show in folder,” or something similar.) Once you’ve located the image, right-click on it again and select, “Edit with Paint 3D.”
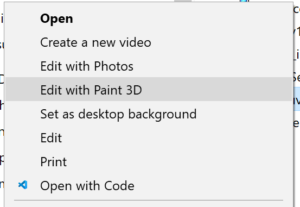
Note that this option will only be available if you’re on a version of Windows 10 that has Paint 3D available and installed, which should be true for virtually everyone running Windows 10. If Paint 3D opens and shows you your image, congratulations! Step 1 complete.
Step 2: Masking Your Object
After Step 1, you should see something along the lines of the following:
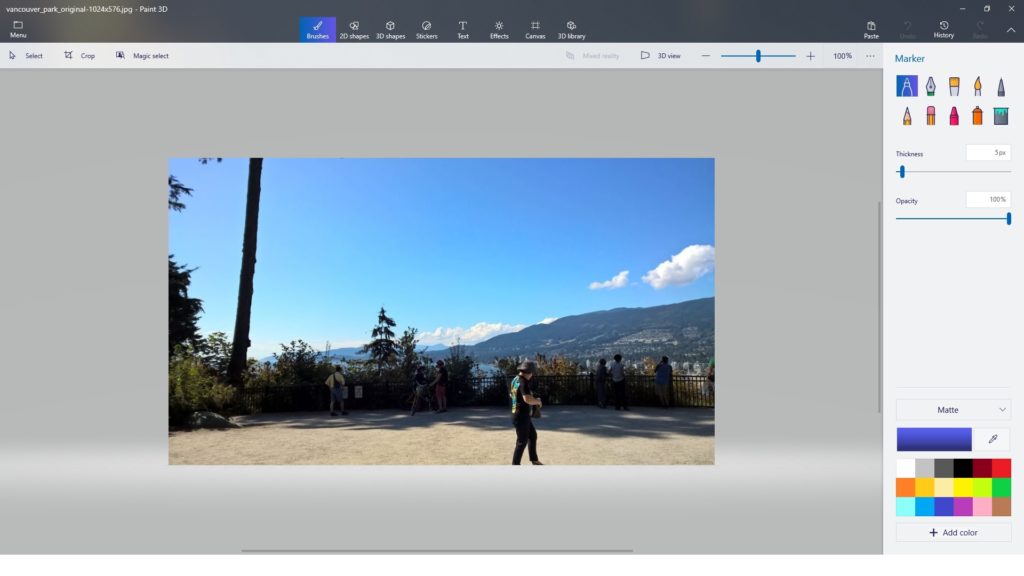
What we’ll do next is create a simple “mask” that will help Paint 3D know what it is we want removed from our image. We’ll do this simply by painting a part of the image a color that stands out from the ordinary content of the image: in this case, pure white.
Let’s concentrate on removing the woman in the foreground nearest the camera. From the top-right side of the screen, select Pixel Pen tool, then select White from the colors in the bottom-right.
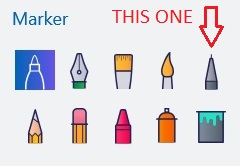
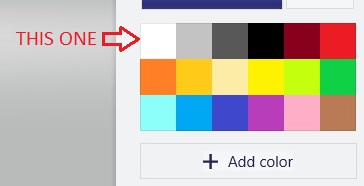
Beneath the menu where you found the Pixel Pen, there’s a slider and text box called Thickness, which controls the width of your pen. I recommend changing that to say 15px (you can just type in the text box if you don’t want to fiddle with the slider), but it’s not really necessary. Once you have your pen and color selected, paint over the part of the image you want to remove. Try to cover the unwanted parts completely; this is not the time to, “color within the lines.” It’s better to paint over a little bit of background than it is to accidentally not paint over a little bit of foreground. You can use your mouse’s scroll wheel to zoom in on the image. When you’re done, your image should look something like this.
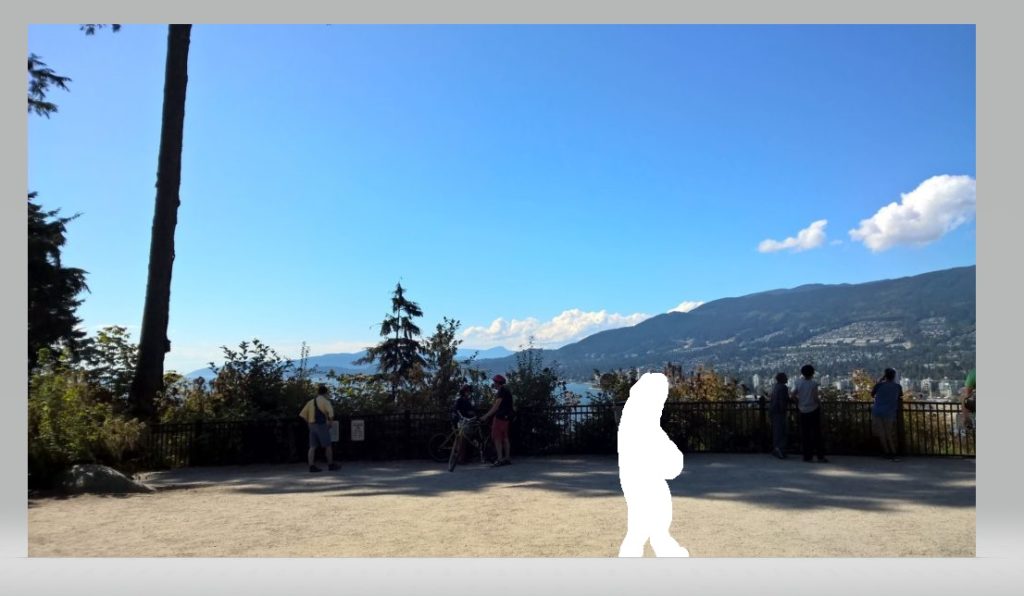
Step 2 complete.
Step 3: Magic Select
Now comes the fun part. In the top-left of your Paint 3D window, you should see three buttons: “Select,” “Crop,” and “Magic select.”
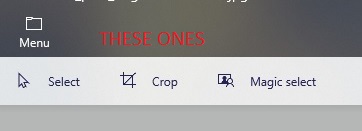
You can just click the Magic Select button here if you want to. This will bring up an interface and a little tutorial that will guide you through the process of using Magic Select. It’s self-explanatory, and it works pretty well. However, it can be fiddly to use the default Magic Select interface while zoomed in, so I tend to activate the feature a different way.
Click the “Select” button, then click and drag to select a rectangle that contains the mask you painted in Step 2. You don’t have to be very precise, but as in Step 2, it’s better to err on the side of selecting too much rather than not enough. Once you have your selection, your screen might look something like this.
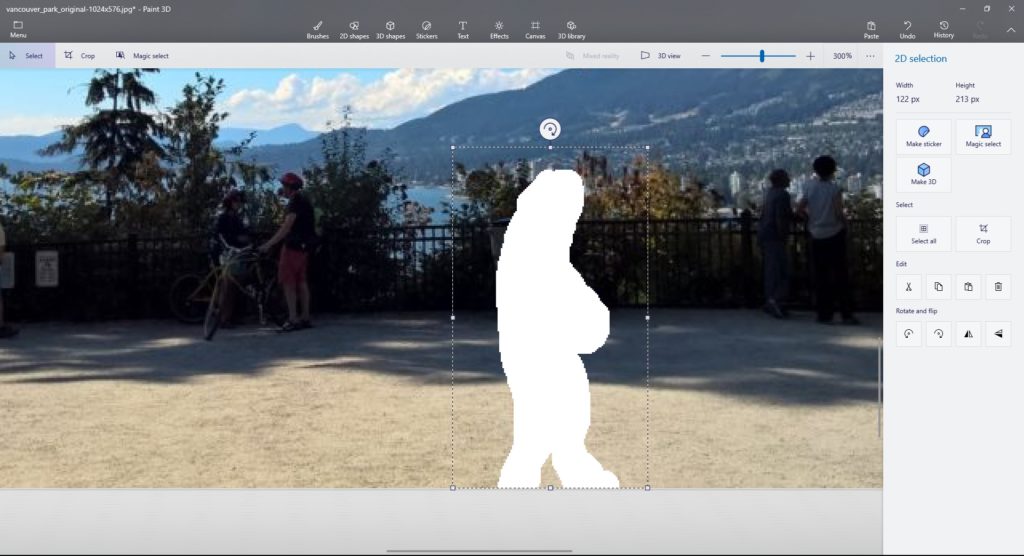
Once you’ve got a part of the image selected, new options appear in the panel on the right-hand side of your screen. In particular, there’s a button that says, “Magic select.” Click that.
When you press that button, Paint 3D will look inside the region you selected and try to figure out what within that region you want to “magically” select. It then highlights that region, darkens the rest of the image, and shows you what it thinks. Sometimes it makes mistakes, so there are some options on the right for how to correct the selection. However, it usually does a pretty good job with the help of the masks, so hopefully you should see something like this:
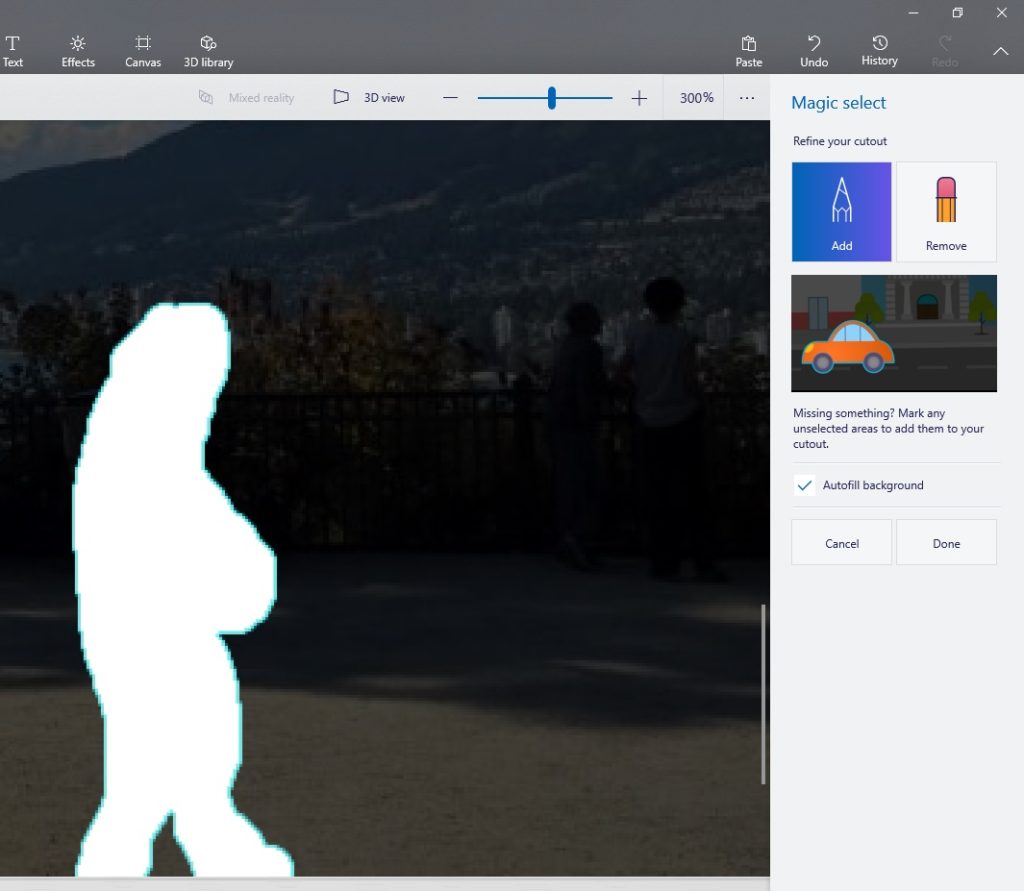
If it has highlighted too much or too little, you can correct it using the “Add” and “Remove” tools visible on the right. Also, be sure that the checkbox labeled “Autofill background” is checked; this is the option that make Magic Select as powerful as it is for object removal. Once you’re happy that everything on this screen is as it should be, click “Done” in the panel on the right.
Paint 3D will think for a moment, then your mask will do a sort of “popping” animation and grow a little bigger. This animation is intended to communicate that Paint 3D has actually pulled the mask off the image behind it, like peeling off a sticker. You could now theoretically do other things with the mask like move it or rotate it, but for our purposes, the only thing we want to do is remove it. Your mask should now be the only thing selected; press the “Delete” key on your keyboard.
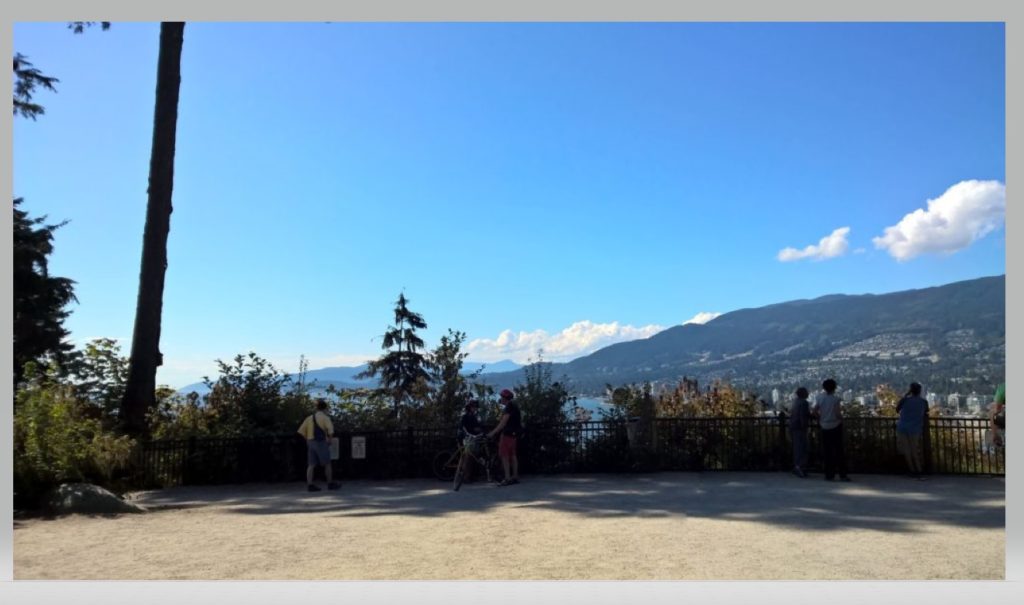
And that’s it: step 3, and the entire process of removing an object, complete!
The results of this process aren’t seamless. If you look carefully at any of the edited images I’ve shown here, you can see oddities about the image (called artifacts in the biz) that show pretty clearly places where it was edited. This process isn’t a replacement for professional photo editing, and I don’t intend for it to hold up to intense scrutiny. It won’t work on everything and it won’t be perfect. But for casual photographers like myself, this is a quick and effective way to make pictures look a little nicer by removing small things that aren’t part of the scenery.
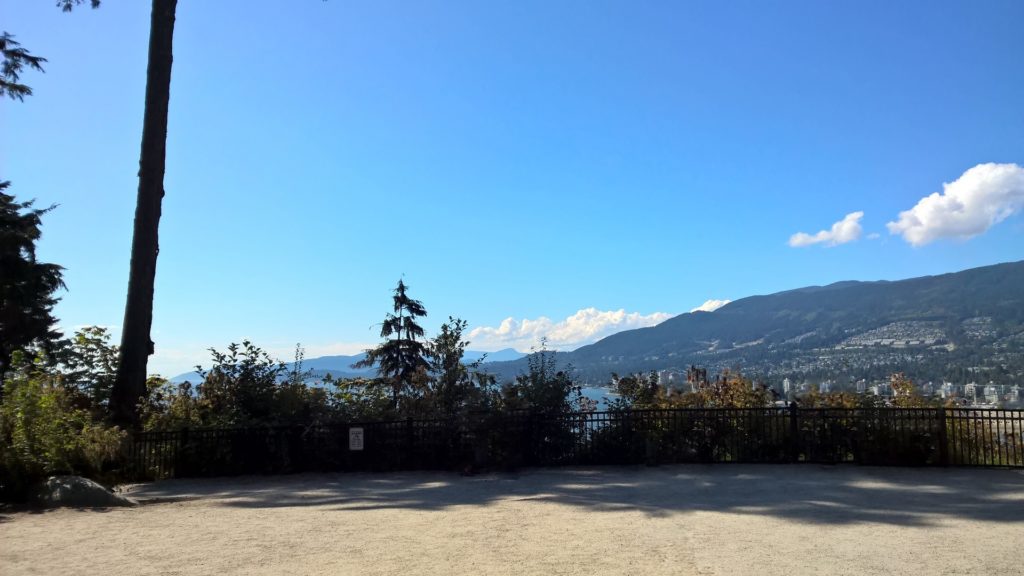
I’ll leave you with one final picture — unedited, but I’m uploading at full resolution in case you want to take a crack at it yourself. What do you suppose this image would be better without?

–Murray
It worked!! I removed the crane 🙂